How to draw a Caricature in 7 easy steps
Published by amrit on Thursday, November 09, 2006 at 5:03 PMThis blog-post is the result of a persistence demand from my bro of giving him fundays on drawing a caricature. I will try to be as systematic as I can be. Before going ahead with the fundays, let me first define what a caricature is, for those who are not too sure.
A caricature is a representation, especially pictorial or literary, in which the subject's distinctive features or peculiarities are deliberately exaggerated to produce a comic or grotesque effect.
I am of course going to talk about the 'pictorial' representation in this post because that is where I am good at. By the way, I guess you have figured out already that 'exaggeration' is the key here. But how does it happen that even when you do not draw someone the way that person actually looks like, people end up recongnizing him/her? This is the art! And this is what I would 'try' to teach in the rest of the post.
I have used Fabre Castle Water Soluble Colored Pencils to make the sample caricature here. You can use any other thing you are comfortable with, like sketch pens, water colors, poster colors or just graphite pencils. The basic rules remain the same. So let's now go straight away to the steps.
Step 1
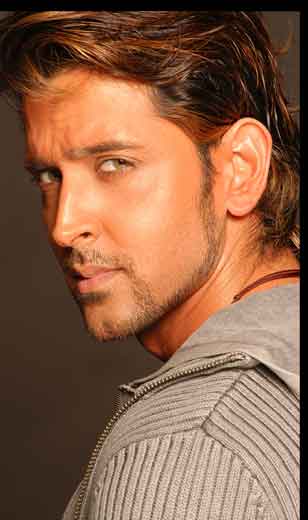
Choose your subject. My subject here is the face of a known personality (once again on my bro's request). I could have chosen to draw a caricature of something other than a human face, like say a monument. But drawing facial caricatures is what really gives me a kick, mostly because it is the most difficult thing to do amongst all the options. And it is difficult because you never know if at the end, the caricature will even look like the real subject!
Step 2
Study your subject's features. Give some time to just looking at the subject, and try to work out the various features which have a scope for exaggeration. A long nose can always be made longer, and a round face can always be made rounder. Try to visualize the yet-to-be-made-caricature in your mind. High cheek-bones? Wide lips? Thick eye-brows? White teeth? Once you have some clue on what to 'attack', you are ready to move on to the next step.
Step 3
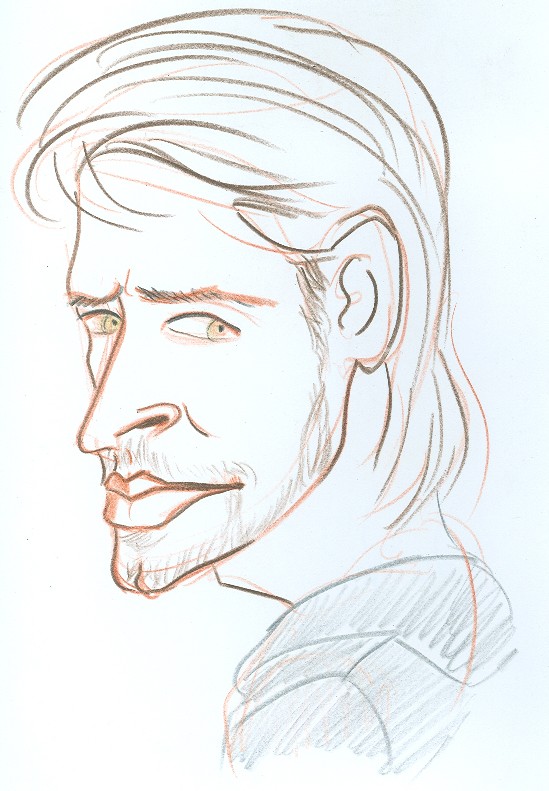
It's action time now. Pull out a pencil and draw the first strokes. Try to give an overall shape which is not the same as the real thing, but also not completely off the mark. I have made the face slightly thinner here and stretched the nose a little too much. But remember not to mess with each and every feature. You have to be careful in selecting the features which are easiest to distort without affecting the resemblance too much. Keep trying for some time, till you are sure that what you have drawn is a decent stuff to proceed with. One tip that might be a help here is that it's always too risky to mess with the distance between the eyes and eybrows. Sometime's you might be able to pull that off, but in general its safer to play with nose or jaw or lips. But then you can always experiment. :)
 Step 4
Once the rough sketch has been rendered, show some confidence and draw bolder lines and kind of settle down on how the caricature is going to look. You can add some more details which were missing in the initial stroking stage.
Step 5
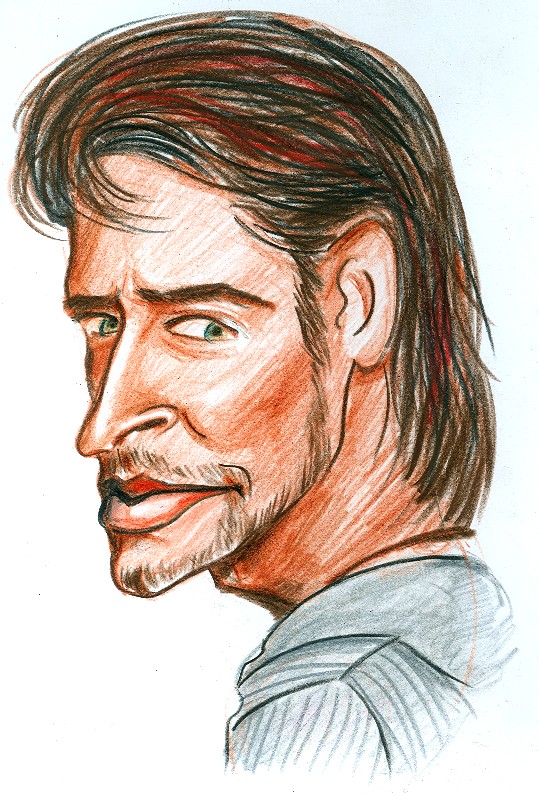
It's coloring time guys/girls. Pull out a couple of more shades and fill up the areas lightly. It's always fun to begin with hairs because even if you mess with them, it wont affect much! :)
 I have seen some guys wondering how to shade the hairs. Here's the tip. Draw them the way they actually are, i.e. if the hairs are long, use long continuous strokes (like in this caricature) and if the hairs are short, use shorter strokes. That's the only trick, or so have I always believed!
Step 6
You pretty much know what follows next. You gotta complete the coloring thing. Shading the face is slightly tricky but with practice you will kind of get the funda. Some parts need to be darker and some portions need to be lighter. Look at the original picture to figure that out and shade accordingly. It's easier to begin with the lighter parts and then darkening the areas that need to be darkened. A lot of people hesitate to go for really dark strokes. But that's not great because at some places you have to use the darkest possible strokes. Once again carefully observe the original pic and you can work that out yourself. It's mostly about careful observation than anything else.
Step 7
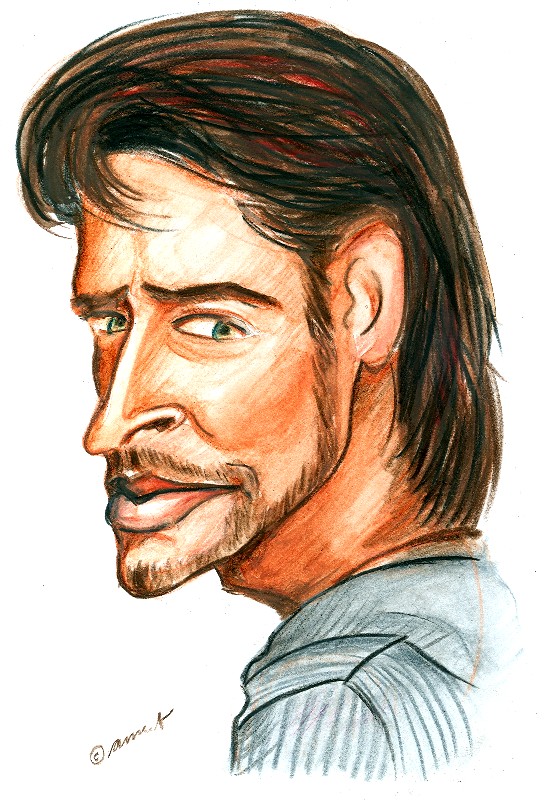
The seventh and the last step is always about the finishing touches. This is important if you really want your work to look like a professional visual piece. Since I used water soluble pencil colors, I picked a wet brush to remove the pencil lines and add softness to the caricature. I also did some more pencil work here and there, and of course added my stupid name! :)
 That's it. The caricature is done!
Go ahead, try out few caricatures and let me know if my fundays were helpful. By the way I agree that this caricature is kinda not so Hrithik-like! But then, remember this always. You never know how much the caricature will actually resemble the actual subject (till you have become a true professional of course). But its okay. Even after having drawn plenty of them, I still fail so often. That however, has never prevented me from trying with more and more subjects and that's what I would ask all you guys to do! Have a nice time.
10 Comments:
Subscribe to:
Post Comments (Atom)
was of great help, though d final one was not so like hritik, but i got the idea
but wht if we dont get a real pic to copy, just given the name , and then draw !
its difficult
applause.
bow down to your studness.
know what.
the first thing i am gonna do once i get placed (if i get placed) is to comission a carricature of meself!
kindly do the honours. :)
ps: that's not the best carricature you have drawn!
I wish the same :)
@Bro
You are welcome. I wish I could do a better job with the caricature. But then, don't care much coz I know I can draw better stuffs! :)
If you are not given a pic to see and draw, then only God can help you. Try praying in temples! Might work.
It's costly because there are too many pencils (I think 48). If you really want, I can buy you a set of 12 which should be enough for you, and which is not all that costly (should come under 100 bucks surely).
@Naresh
Thanks. Both for the compliment and for increasing the comment-count :D
And yep, I can't agree more. That's certainly not the best caricature that I have drawn.
By the way, myself and Anshuman were discussing the idea of having your caricature done the other day. So you see, you don't really have to get placed for this. :) Lucky you!!
You are welcome. Just let me see your work when you are done. Would love to!
Art is talent. I accept. But it's fun trying! I never knew I could make caricatures till I tried! Give it a shot. In fact you can always come up with some better innovative way of making caricatures.
Anyways, as I have mentioned in the beginning of the post, it was mostly for my dear bro, who actually is as good as me in drawing and stuff, but was kind of not sure how to go about this caricature thing. So though, I ended up putting up things in a way that makes the job look so simple from outside, we all know that one needs a 'basic talent' to begin with! :)
By the way, when it comes to art, a mutant mickey mouse might be as good in someone's eyes as this hardly-looking-like Hrithik caricature!